Contents
配置NTP服务器
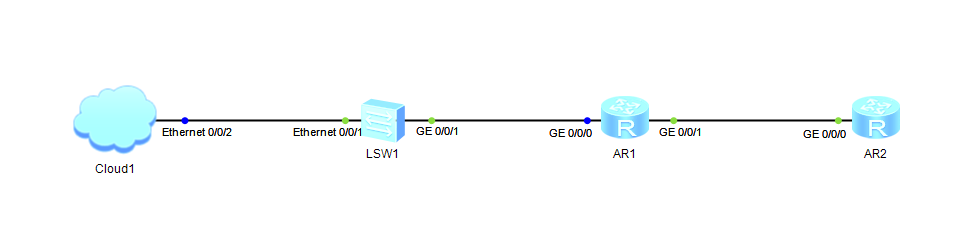
1.拓扑图
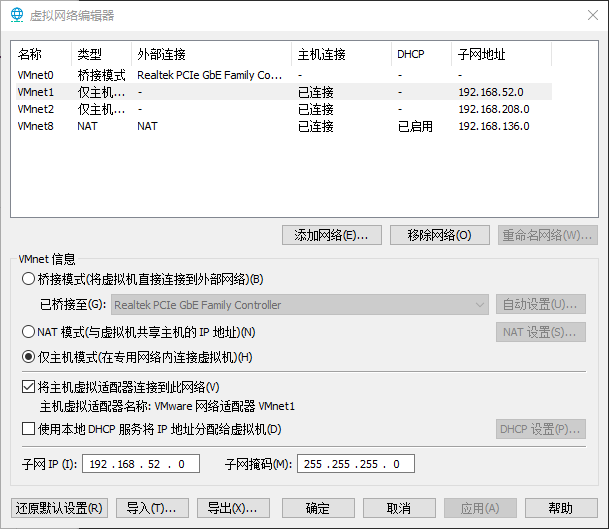
2.配置VM虚拟机VMnet1网卡
VMnet1仅主机,没有的话,可以添加网络生成一个
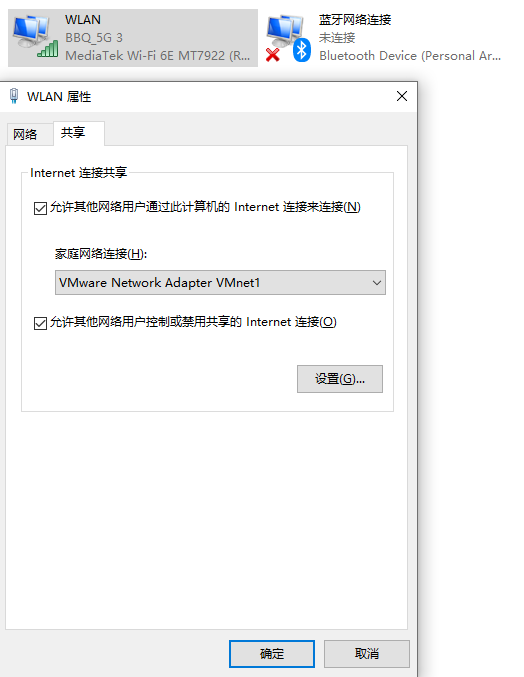
3.配置共享网络
右键你可以上网的网卡-》共享-》选择VMnet1
4.配置R1
<R1>sys
[R1]interface GigabitEthernet 0/0/0
[R1-GigabitEthernet0/0/0]ip address 192.168.137.44 24
[R1-GigabitEthernet0/0/0]quit
[R1]interface GigabitEthernet 0/0/1
[R1-GigabitEthernet0/0/1]ip address 172.16.0.1 24
[R1-GigabitEthernet0/0/1]quit

[R1]ip route-static 0.0.0.0 0 192.168.137.1
测试连通

5.配置NTP服务
获取阿里云时间服务器地址
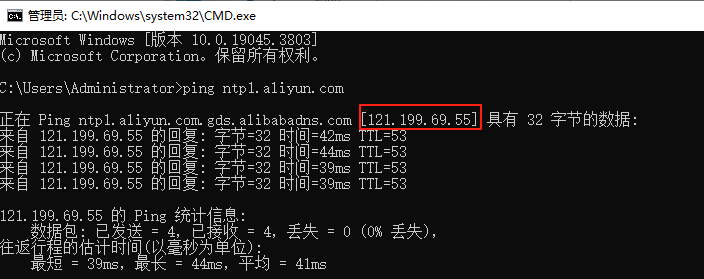
ntp-service unicast-server 121.199.69.55
ntp-service refclock-master
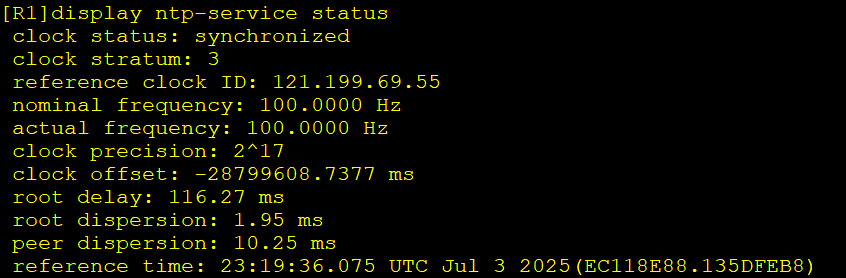
display ntp-service status
display clock

6.测试
<R1>clock datetime 14:00:00 2025-7-2

10多分钟之后,再次查看时间

7.查看ntp服务命令
7.1.查看本地NTP会话的状态
display ntp-service sessions

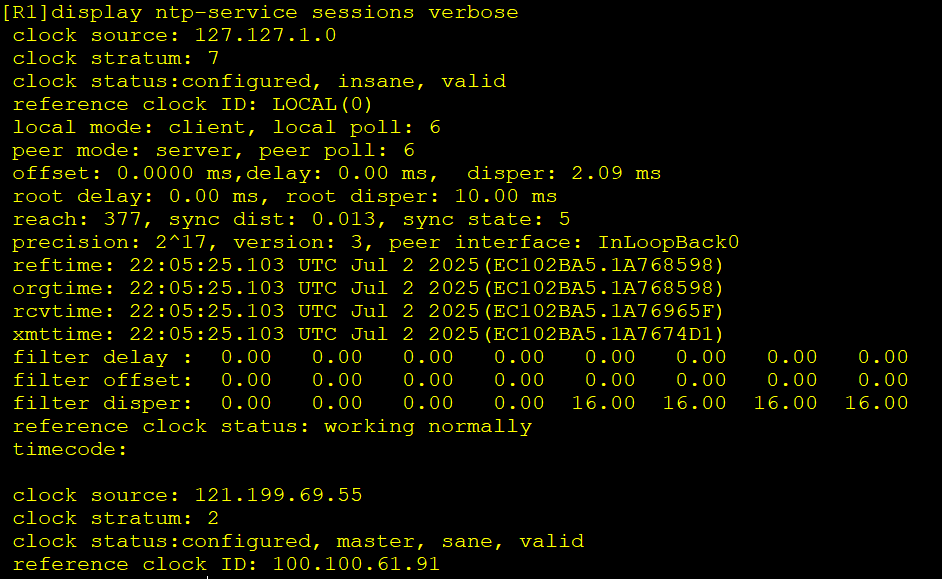
7.2.查看本地设备NTP会话的详细信息
display ntp-service sessions verbose
7.3.查看从本地设备到参考时钟源的路径
display ntp-service trace

7.4.查看NTP报文的统计信息
display ntp-service statistics packet
7.5.查看最新的10条时钟不同步原因
display ntp-service event clock-unsync
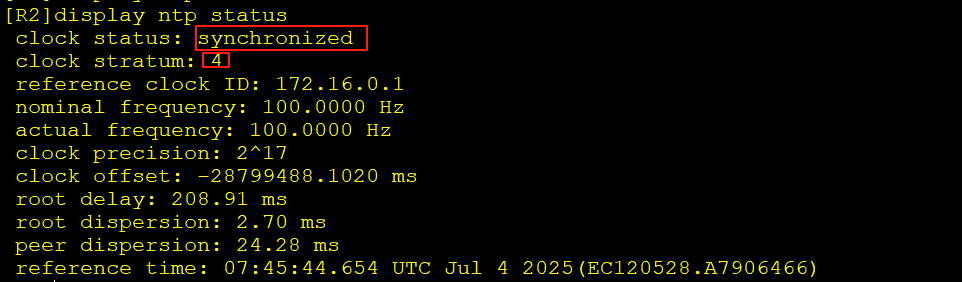
8.为路由R2配置NTP服务
<Huawei>sys
[Huawei]sys R2
[R2]int g 0/0/0
[R2-GigabitEthernet0/0/0]ip add 172.16.0.2 24
[R2-GigabitEthernet0/0/0]quit

[R2]ntp-service unicast-peer 172.16.0.1
[R2]ntp-service refclock-master
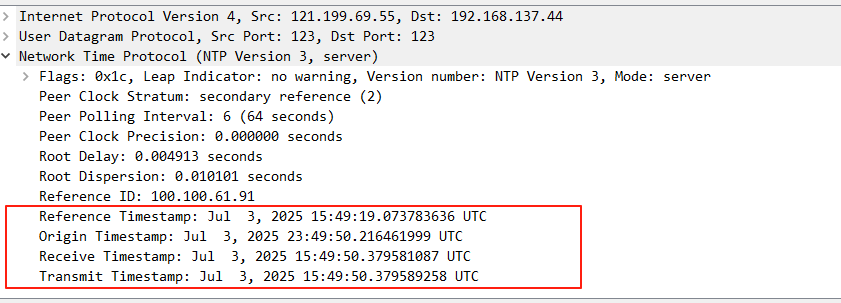
9.抓包
用4组时间来修改时钟